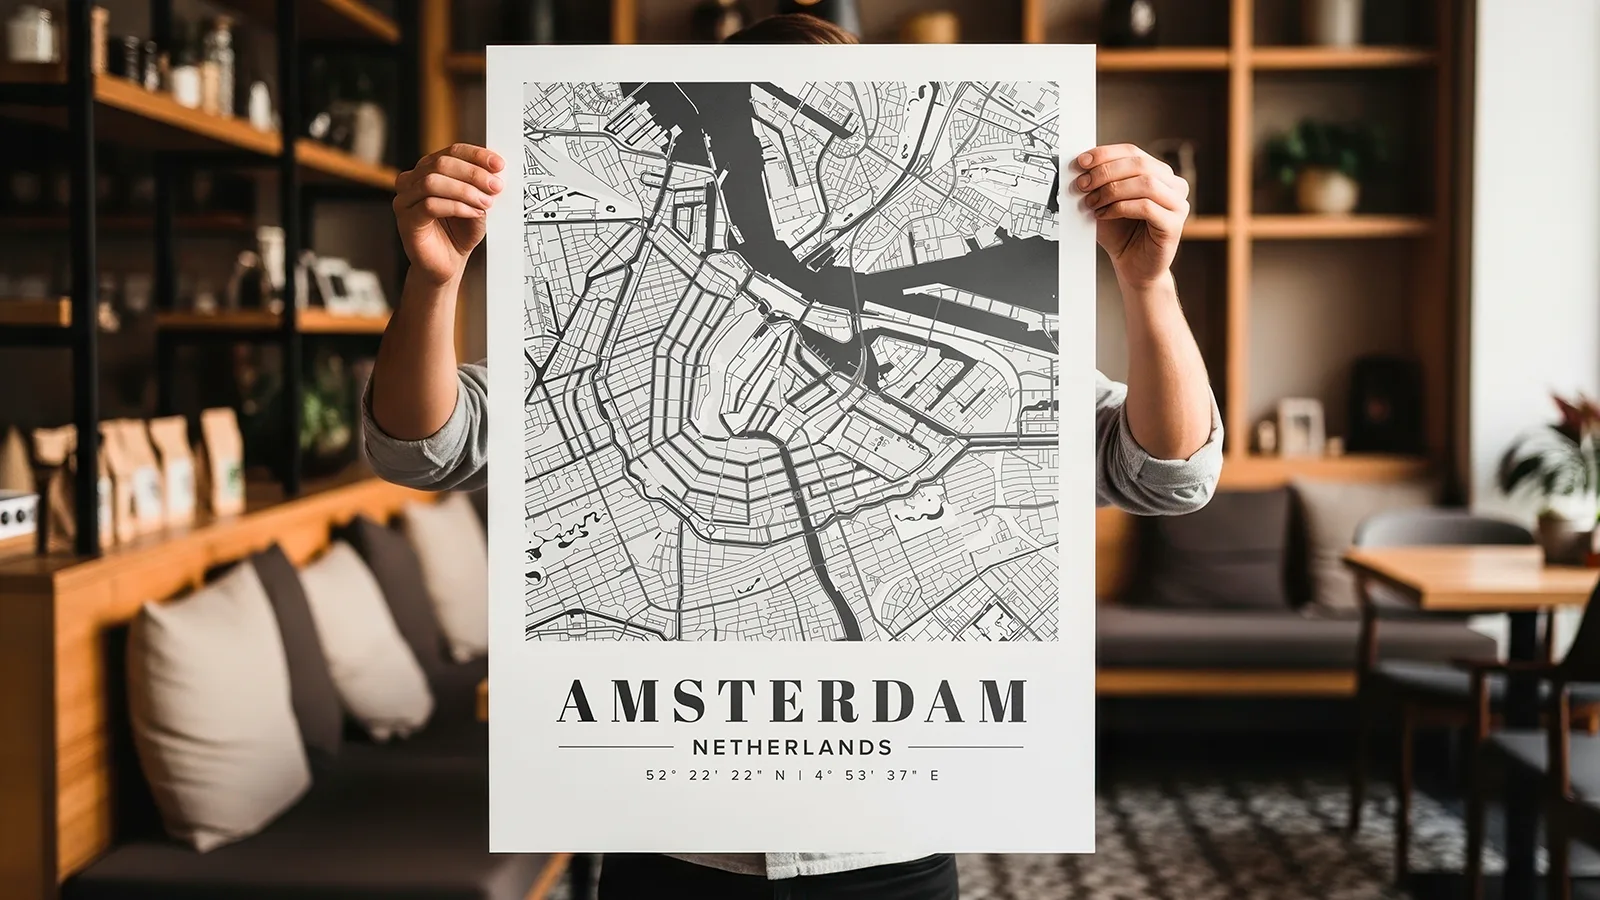
Custom map posters are one of the most popular forms of map art – a city someone lives in, the street they grew up on, the place they got married. Making one comes down to two things: a clean source map of the right area, and a bit of styling in a design tool. MapVG handles the first part, exporting an editable map of any location on Earth, and this guide covers the rest – from export to print-ready poster.
The basics
Before we dive into the the steps of creating a custom map poster, let’s cover some basics you need to know to ensure that your poster turns out in high quality.
What is a vector map and why do I need it?
Everything starts with sourcing a map – one that can be restyled and scaled to whatever size we want our poster to be. A Google Maps screenshot or downloaded map image won't work because raster images are fixed pixels, so the colours can't be changed, elements can't be removed, and the image falls apart when enlarged to print size.
A vector map is different – every road, river, and park is a separate editable path that can be recoloured, deleted or reshaped, and scaled to any poster size without losing sharpness. If you’re unfamiliar with vector files, we recommend you read our guide “Pixels vs paths: A designer's guide to vector maps” that explains the difference.
If you’re wondering where to get vector maps from, you’re already in the right place: MapVG is an online map-to-vector converter that turns any area on Earth into a layered SVG (Scalable Vector Graphic), ready to style.
Can I sell map posters made with MapVG?
Yes. MapVG maps are built from OpenStreetMap data under the ODbL licence. This licence allows commercial use, meaning your finished poster designs can be sold on Etsy, in print shops, or directly to clients – according to our licensing guide.
The only thing we ask is that, if you’re planning on using a MapVG map for commercial purposes, you adhere to OpenStreetMap’s licence and add a ©OpenStreetMap contributors credit somewhere small on your artwork.
Step 1: Export a vector map with MapVG
Open the MapVG editor and search for the place your poster will feature. Frame the exact area you want – a city centre, a neighbourhood, a coastline, or a single street and its surroundings.
In this guide we’ll use Amsterdam as the example – a good demonstration of framing, since the canal ring gives the poster a natural centre.
Tip: Maps up to 1 km² are free to export, which is ideal for testing the output file or creating map posters of a neighbourhood or suburb.
Choose what map elements to include
MapVG lets you select what map elements to include in your export. For posters, less is often more, so include only the layers your design needs. Many of the best-selling map posters use just land, water, and roads, letting the street network itself become the artwork.
In our Amsterdam example, we’ll uncheck labels, boundaries, buildings, railways, and even some natural features (such as wetlands and agricultural farm land).
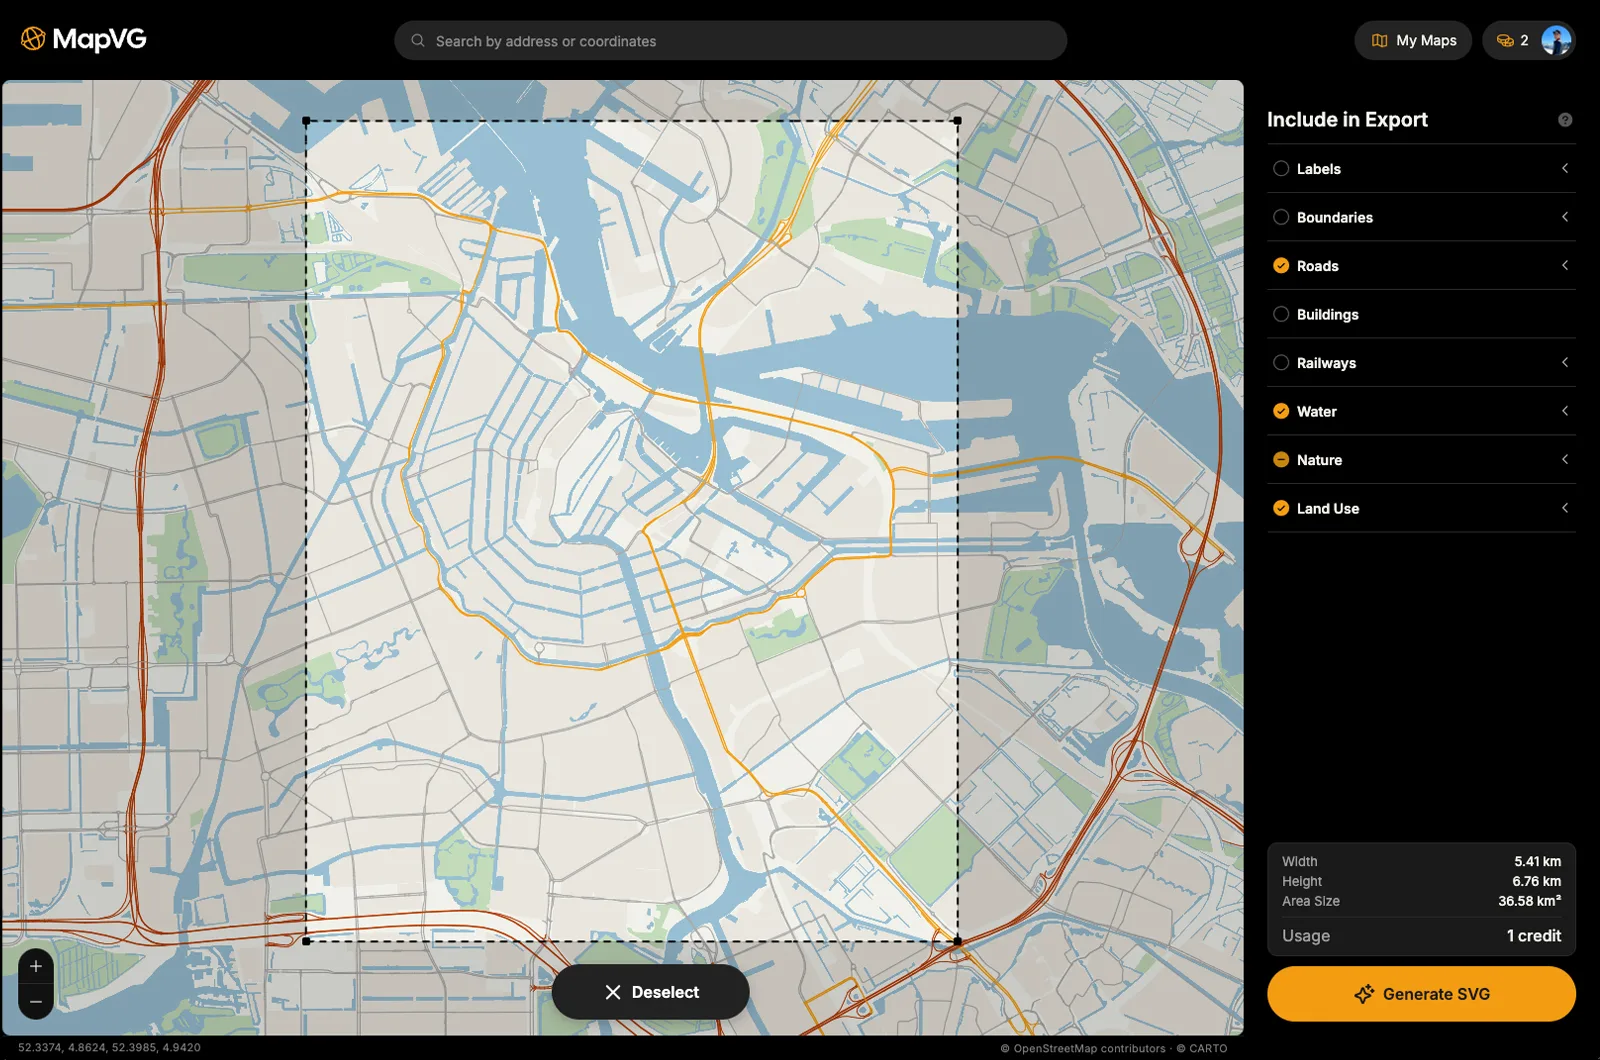
Once you’re happy with your selections, hit the “Generate SVG button” to vectorise the map. MapVG then converts the chosen area into a high quality SVG map. Typically, this only takes a few seconds but larger maps with lots of detail (for example Tokyo or Mexico City) can take up to a couple of minutes. Our Amsterdam map was ready to download in just 15 seconds.
Step 2: Style the map in your design tool
This is where you can let your creativity run free, and no expensive software is needed for this part. Any vector editor can open the exported SVG, and several excellent ones are free:
Inkscape (free) – open-source vector editor for Windows, Mac and Linux; a solid choice for a first map poster.
Affinity (free) – professional-grade design app, free to download and use.
Figma (free plan) – runs in the browser, so there's nothing to install.
Adobe Illustrator (paid) – the industry standard, if you already have a Creative Cloud subscription.
Styling your map
Whichever software you go with, every element of the map arrives as an editable vector path, organised into named layers. This makes it easy to select the elements or layers you want to work on, and apply the poster style you prefer.
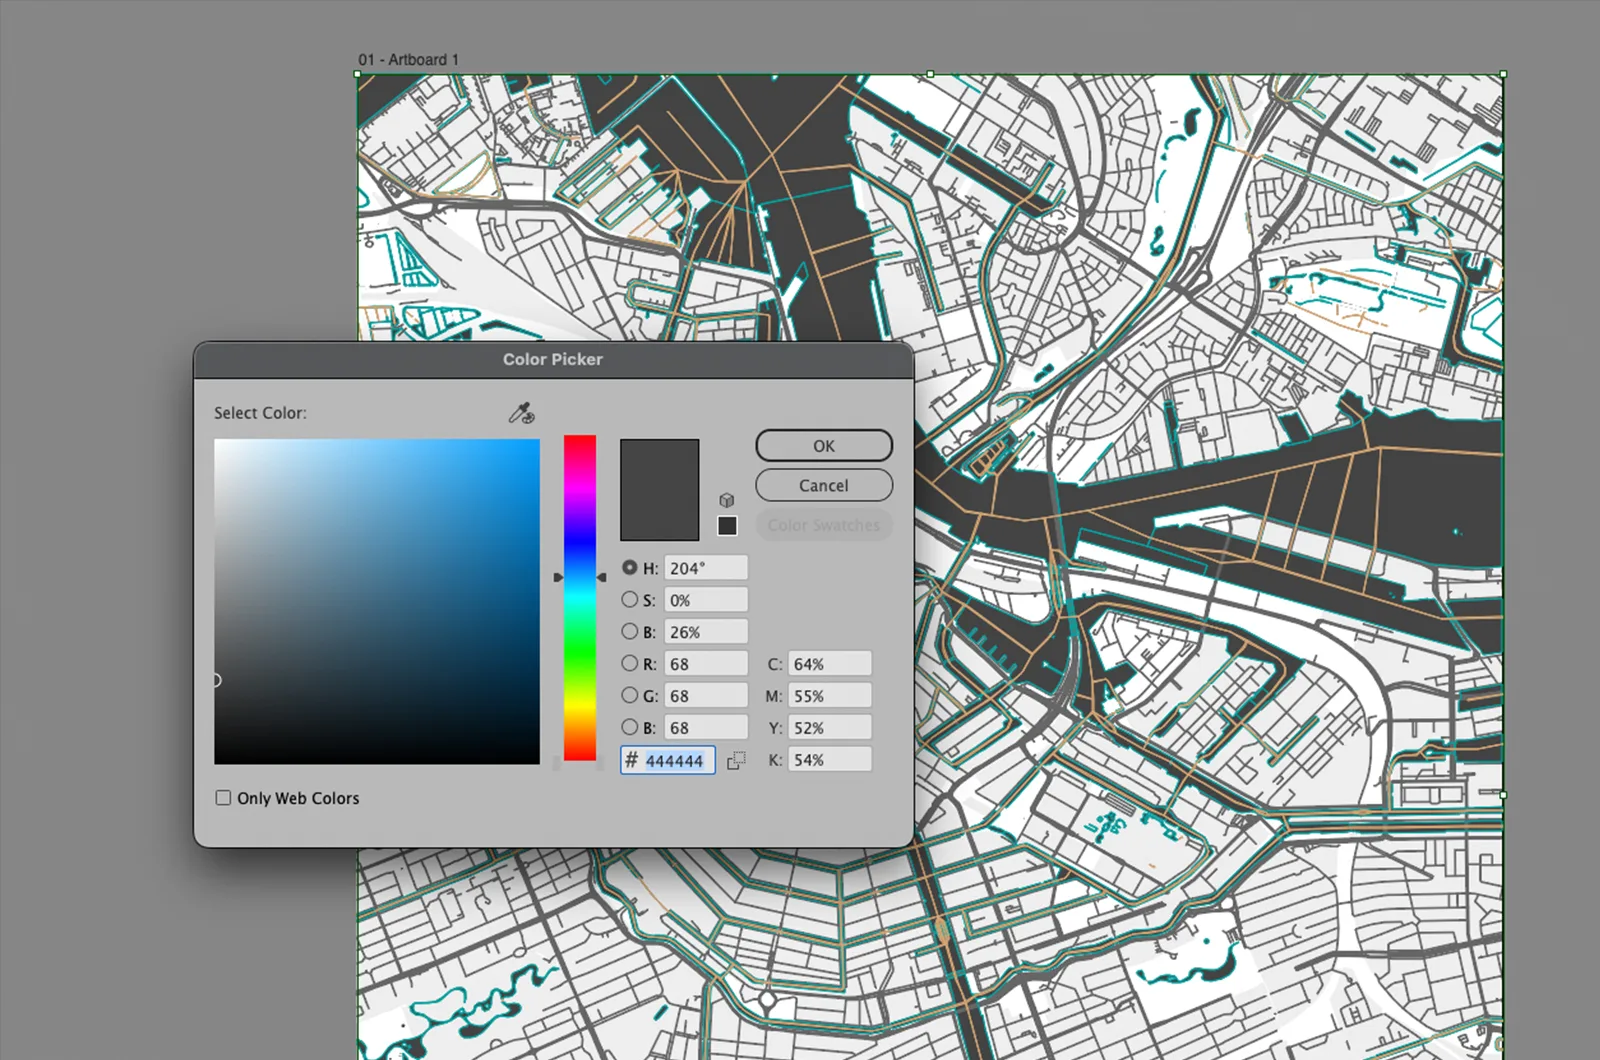
Choose a classic map poster style or make it truly unique by adjusting road stroke weights, recolouring elements and changing fonts and font sizes.
Our Amsterdam example uses a monochrome design – a single, neutral colour family across canals, streets and land, which lets the shape of the city carry the design. If you need some guidance on how to achieve a certain style, here are four of the most popular map poster styles:
Minimal line art – delete everything except roads, set a single stroke colour on a plain background
Monochrome – one colour family across roads, water and land for a subtle, tonal look
High contrast – light streets on a dark background, a staple of modern map wall art
Full colour – keep parks and water for a richer, atlas-style print
Step 3: Add typography
Rather than adding text directly into the map file, create a new document at your poster size – A3, A2, or whatever the final print will be – and place the styled map inside it. Keeping the map as its own file means it stays clean and reusable: the same Amsterdam map can go into an A2 poster today and a square print or a different layout later, without the need to edit the source map file.
With the map placed, add the text. Most city map posters follow a simple formula: the map, the place name, and the coordinates – for this example, "Amsterdam" with the country “Netherlands” below, followed by the longitude and latitude. This information is easy to source with a simple Google search for “Coordinates of Amsterdam”.
Country or region names, a date, or a short personal line ("where it all began") turn a city print into a personalised map poster – the format that sells best as a gift.
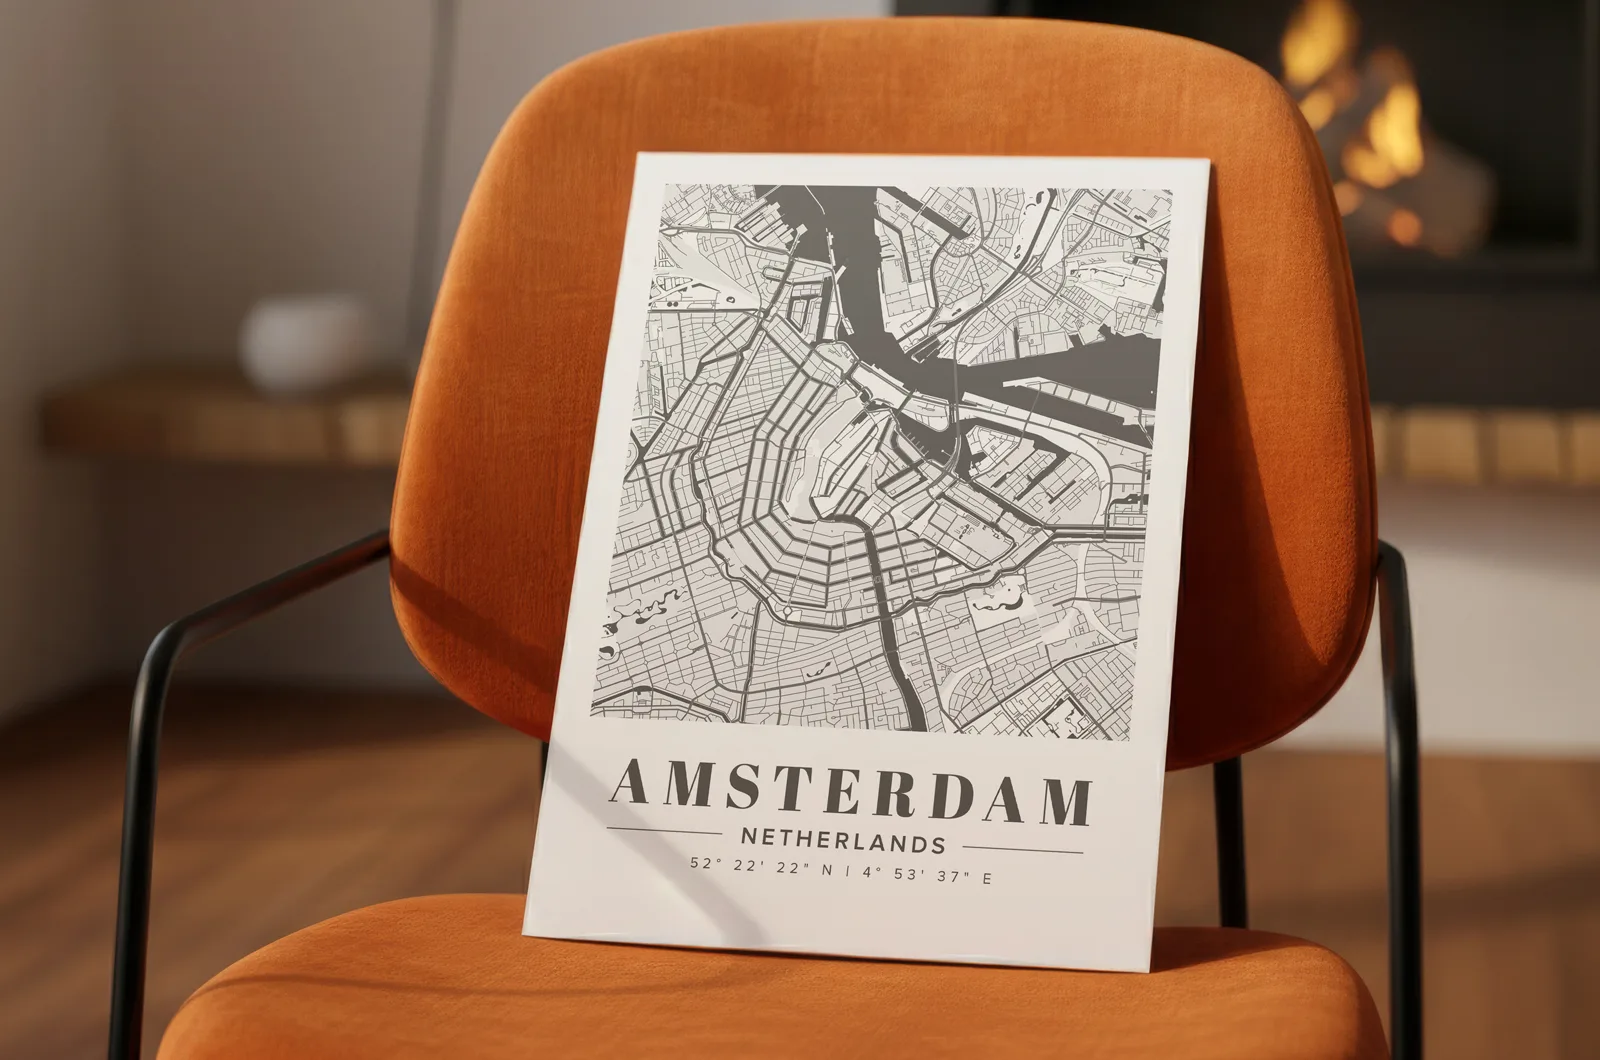
Once the layout feels right, export the poster as a PDF from your design tool. Vector data survives the export intact – the roads and canals in the PDF are still paths, not pixels – so the elements in the file continue to be scalable to any size.
Add bleed if your printer requires it, and the poster is ready: from a framed map on MapVG to a print-ready file, in three easy steps.
Design your own map poster with MapVG for free
Every poster starts with the map. MapVG, the online vector map maker, allows you to create your own custom city maps without the need for any GIS or cartography knowledge. Export your maps as layered SVG vector files, ready for post-processing and selling on Etsy, Facebook marketplace, or your own online store.
Export a free map of any area up to 1 km² – no credits needed – and follow the steps above to create your first trial map poster.